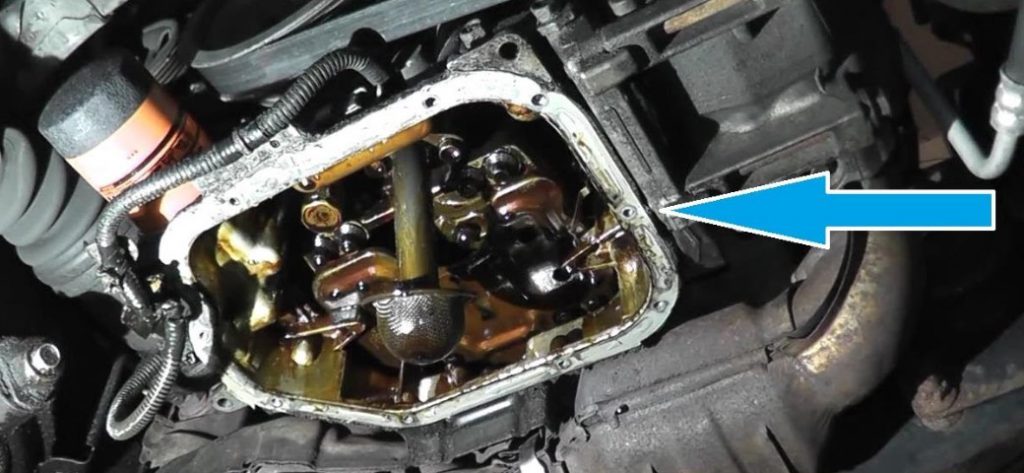
Whether you just have bought a brand new car, or driving on your old buddy, you have to remove the gasket sooner or later. Maybe it can be for regular cleaning or replacing a damaged one.
As this maintenance is undeniable, a DIY process can keep your couple of bucks in the pocket each time it needs to be removed. Necessarily, not all people have the knowledge about how to remove old gasket from oil pan.
If we’re not wrong, you’re one of them as well. Removing an old gasket without proper technique can lead to a complete mess. That is why we have formulated this DIY guide for you with a few simple steps.
What Is a Gasket and Where Is It Located On An Engine?
A gasket is a ring that seals the joint between two surfaces and helps prevent leaks. Gaskets are typically made of metal, rubber, or some other synthetic material and are used to seal the engine internals from the environment.
They can be found on engine blocks, cylinder heads, valves, and exhaust systems. This component is used to eliminate or reduce the effect of friction between two surfaces.
Technically, oil gaskets act as a seal, keeping liquids and air from escaping. Without gaskets, engine components could become damaged due to excessive heat buildup in the engine.
Why Should You Change An Old Gasket?
One of the most common causes of engine failure is gasket failure. Over time, heat and wear can cause these rings to crack or come off completely, which can lead to engine failure. If you have an old gasket that needs to be replaced, there are several reasons why you should make the switch.
How to Remove Old Gasket From Oil Pan – Steps

If you are experiencing oil leaks from your engine, it is likely that the old gasket is no longer sealing the oil pan properly. Replacing the old gasket with a new one can help solve the problem and prevent future leaks. Here is the step-by-step process to remove the old gasket from an oil pan.
Step-1:
Removing an oil seal on an engine can be a daunting task, but with the right tools, it can be done quickly and easily. Here are the tools you’ll need:
– Hammers or screwdrivers
– Wrenches or pliers
– Nutdriver
– Flathead screwdriver
– Socket wrench (or equivalent)
– Old Rag
– ATF(for cleaning)
Step-2:
First up, you have to remove the bolt that is attached to the metal oil pan. This bolt should be located near one of the corners of the pan. If it’s hard to get to, use a pry bar or a screwdriver to lever it out from under the rubber washer.
Step-2:
Use a wrench or pliers to loosen up the bolts that hold on the metal ring that covers the bearings. Be careful not to strip them!
Step-3:
Now, remove the metal oil pan gasket. This can be a pain to get off, so make sure you have everything else removed properly. You may need to cut or grind it some if it’s really stuck on there. Be sure not to scrap any of the bearings in the process!
Step-4:
Use a putty knife and some ATF to smear all of the old gasket material away from the oil pan. This will help prevent any of it from getting into the motor again.
Step-5:
You can use a shop vac to suck the remaining ATF out of the pan and into a catch container. Once done, re-install the metal ring and tighten the bolts down. Careful not to strip them!
Bonus Tips for the Replacement Process – Final Word
After removing the old gasket from your oil pan, if you notice the gasket is damaged or worn too much, it’s time to replace it. Follow these steps to replace it properly with a new one. However, you have to bring the right oil gasket at first and then proceed to the next.
Related Articles:
